TM 9-2320-387-24-2
~ERENTIAL
REPAIR
(Cont’d)
I
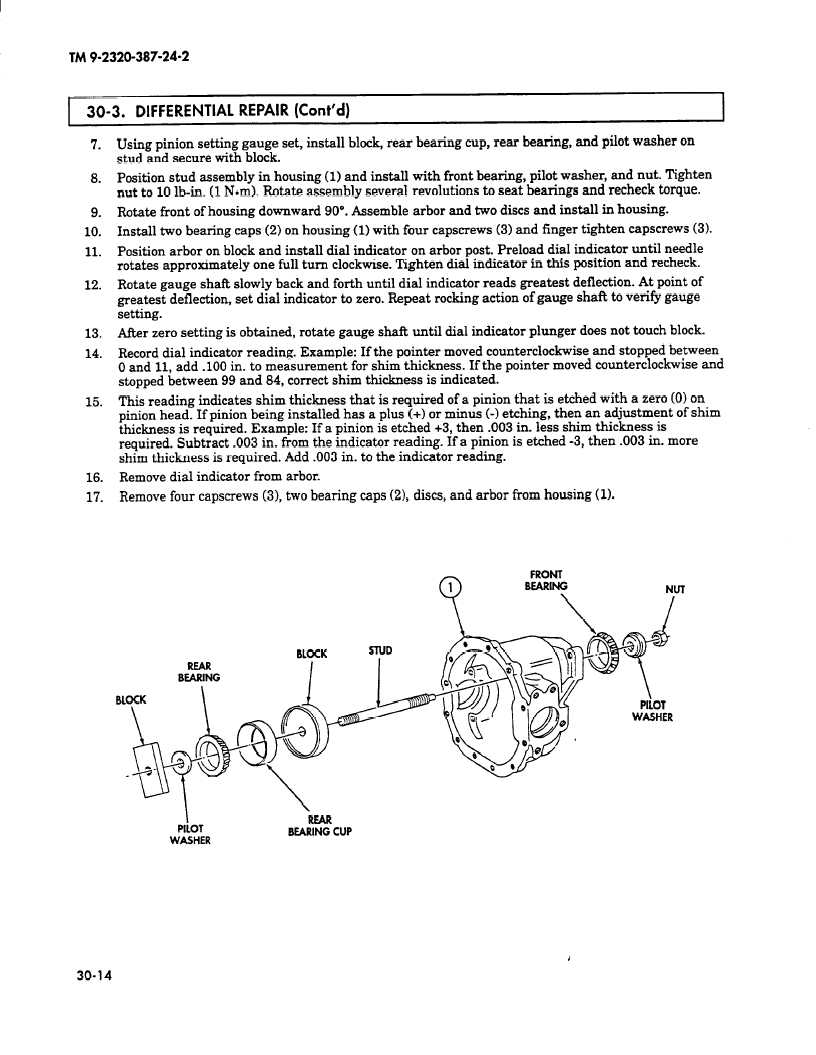
7.
8.
9.
10.
11.
12.
13.
14.
15.
16.
17.
Using pinion setting gauge set, install block, rear bearing cup, rear bearing, and pilot washer on
stud and secure with block.
Position stud assembly in housing (1) and install with front bearing, pilot washer, and nut. Tighten
nut to 10 lb-in. (1 N-m). Rotate assembly several revolutions to seat bearings and recheck torque.
Rotate front of housing downward 90”. Assemble arbor and two discs and install in housing.
Install two bearing caps (2) on housing (1) with four capscrews (3) and finger tighten capscrews (31.
Position arbor on block and install dial indicator on arbor post. Preload dial indicator until needle
rotates approximately one full turn clockwise. Tighten dial indicator in this position and recheck.
Rotate gauge shaft slowly back and forth until dial indicator reads greatest deflection. At point of
greatest deflection, set dial indicator to zero. Repeat rocking action of gauge shaft to verify gauge
setting.
After zero setting is obtained, rotate gauge shaft until dial indicator plunger does not touch block.
Record dial indicator reading. Example: If the pointer moved counterclockwise and stopped between
0 and 11, add .lOO in. to measurement for shim thickness. If the pointer moved counterclockwise and
stopped between 99 and 84, correct shim thickness is indicated.
This reading indicates shim thickness that is required of a pinion that is etched with a zero (0) on
pinion head. If pinion being installed has a plus (+) or minus (-1 etching, then an adjustment of shim
thickness is required. Example: If a pinion is etched +3, then .003 in. less shim thickness is
required. Subtract -003 in. from the indicator reading. If a pinion is etched -3, then -003 in. more
shim thickness is required. Add .003 in. to the indicator reading.
Remove dial indicator from arbor.
Remove four capscrews (31, two bearing caps (2), discs, and arbor from housing (1).
WASHER
PILOT
WASHER
BEARING CUP
30-14