TM 9-2320-387-24-l
4-72. STARTER POWER CABLES REPLACEMENT
This task covers:
a. Removal
b. Installation
INITIAL SETUP:
ToOlS
General mechanic’s tool kit:
automotive (Appendix B, Item 1)
Maintenance and repair shop equipment:
automotive (Appendix B, Item 2)
Materials/Parts
Manual References
TM 9-2320-387-24P
Equipment Condition
Battery ground cables disconnected (para. 4-68).
Maintenance
Level
Unit
Six lockwashers (Appendix G, Item 212)
Tiedown strap (Appendix G, Item 4601
Adhesive sealant (Appendix C, Item 12)
NOTE
Prior to removal, tag all leads for installation.
1.
2.
3.
4.
5.
6.
7.
8.
9.
10.
4-122
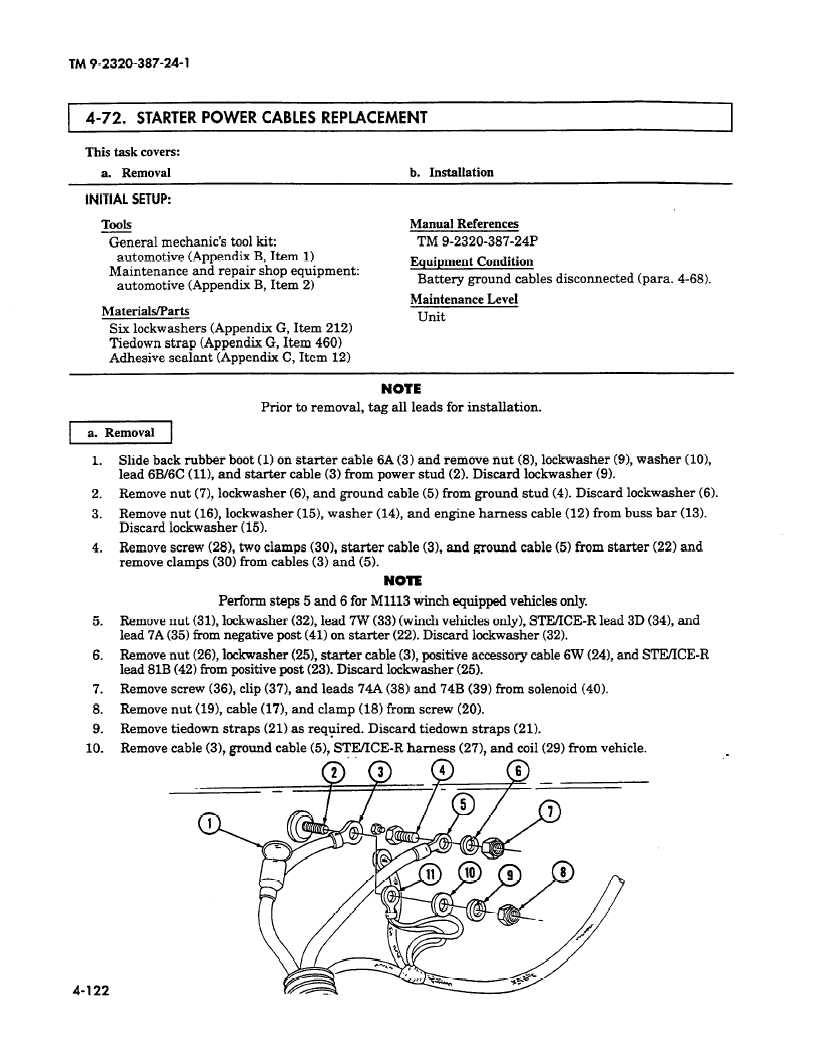
Slide back rubber boot (1) on starter cable 6A (3) and remove nut (81, lockwasher (9), washer (101,
lead 6B/6C (111, and starter cable (31 from power stud (2). Discard lockwasher (91.
Remove nut (7), lockwasher (61, and ground cable (51 from ground stud (41. Discard lockwasher (6).
Remove nut (161, lockwasher (15), washer (141, and engine harness cable (12) from buss bar (13).
Discard lo&washer (15).
Remove screw (28), two clamps (301, starter cable (31, and ground cable (5) from starter (22) and
remove clamps (30) from cables (3) and (5).
NOTE
Perform steps 5 and 6 for Ml113 winch equipped vehicles only.
Remove nut (31), lo&washer (321, lead 7W (33) (winch vehicles only), STEKE-R lead 3D (341, and
lead 7A (35) from negative post (41) on starter (22). Discard lockwasher (32).
Remove nut (261,lockwasher (251, starter cable (31, positive accessory cable 6W (241, and STE/ICE-R
lead 81B (421 from positive post (23). Discard lo&washer (25).
Remove screw (361, clip (371, and leads 74A (38) and 74B (391 from solenoid (401.
Remove nut (191, cable (171, and clamp (18) from screw (20).
Remove tiedown straps (21) as required. Discard tiedown straps (211.
Remove cable (31, ground cable (51, STE/ICE-R harness (27), and coil (29) from vehicle.