TM 9-2320-387-24-l
4-72. STARTER POWER CABLES REPLACEMENT (Co&d)
I
1 b. Installation
1
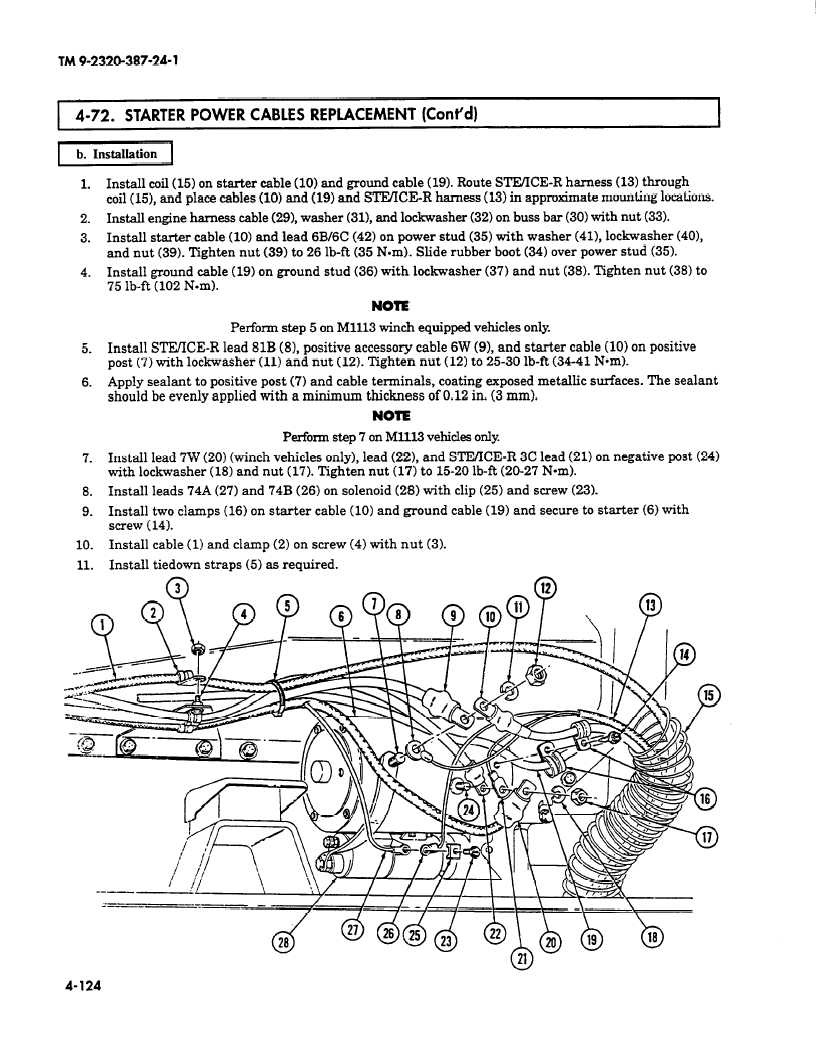
1.
2.
3.
4.
5.
6.
7.
8.
9.
10.
11.
Install coil (15) on starter cable (10) and ground cable (19). Route STIVICE-R harness (13) through
coil (15), and place cables (10) and (19) and STlVICER harness (13) in approximate mounting locations.
Install engine harness cable (29), washer (31), and lockwasher (32) on buss bar (30) with nut (33).
Install starter cable (10) and lead 6B/6C (42) on power stud (35) with washer (41), lockwasher (40),
and nut (39). Tighten nut (39) to 26 lb-ft (35 Nom). Slide rubber boot (34) over power stud (35).
Install ground cable (19) on ground stud (36) with lo&washer (37) and nut (38). Tighten nut (38) to
75 lb-ft (102 N-m).
NOTE
Perform step 5 on Ml113 winch equipped vehicles only.
Install STEYICE-R lead 81B (8), positive accessory cable 6W (9), and starter cable (10) on positive
post (7) with lockwasher (11) and nut (12). Tighten nut (12) to 25-30 lb-ft (34-41 Nom).
Apply sealant to positive post (7) and cable terminals, coating exposed metallic surfaces. The sealant
should be evenly applied with a minimum thickness of 0.12 in. (3 mm).
NOTE
Perform step 7 on Ml113 vehicles only
Install lead 7W (20) (winch vehicles only), lead (22), and SIR/ICE-R 3C lead (21) on negative post (24)
with lockwasher (18) and nut (17). Tighten nut (17) to 15-20 lbft (20-27 Nom).
Install leads 74A (27) and 74B (26) on solenoid (28) with clip (25) and screw (23).
Install two clamps (16) on starter cable (10) and ground cable (19) and secure to starter (6) with
screw (14).
Install cable (1) and clamp (2) on screw (4) with nut (3).
Install tiedown straps (5) as required.
4-124