TM 9-2320-387-24-2
1 10-M.
BODY REPAIR (Cont’d)
(d) Shear lock using a pin punch to drive out pin.
(e) Pry out remainder of locking collar.
(0 Using a drill slightly smaller than rivet shank, drill almost through rivet head.
(g) Pry off rivet head with a pin punch.
(h) Tap out rivet shank with a pin punch.
3.
RivnutE’lusnut Removal.
(a) Drill through rivnut head.
(b) Punch out shank.
4.
Rivet Hole Drilling.
(a>
(b>
(c)
Center-punch all new rivet locations. Center punch mark must be large enough to prevent drill
from slipping out of position, yet it must not dent the surface of the material. To prevent denting,
place a bucking bar behind material during punching.
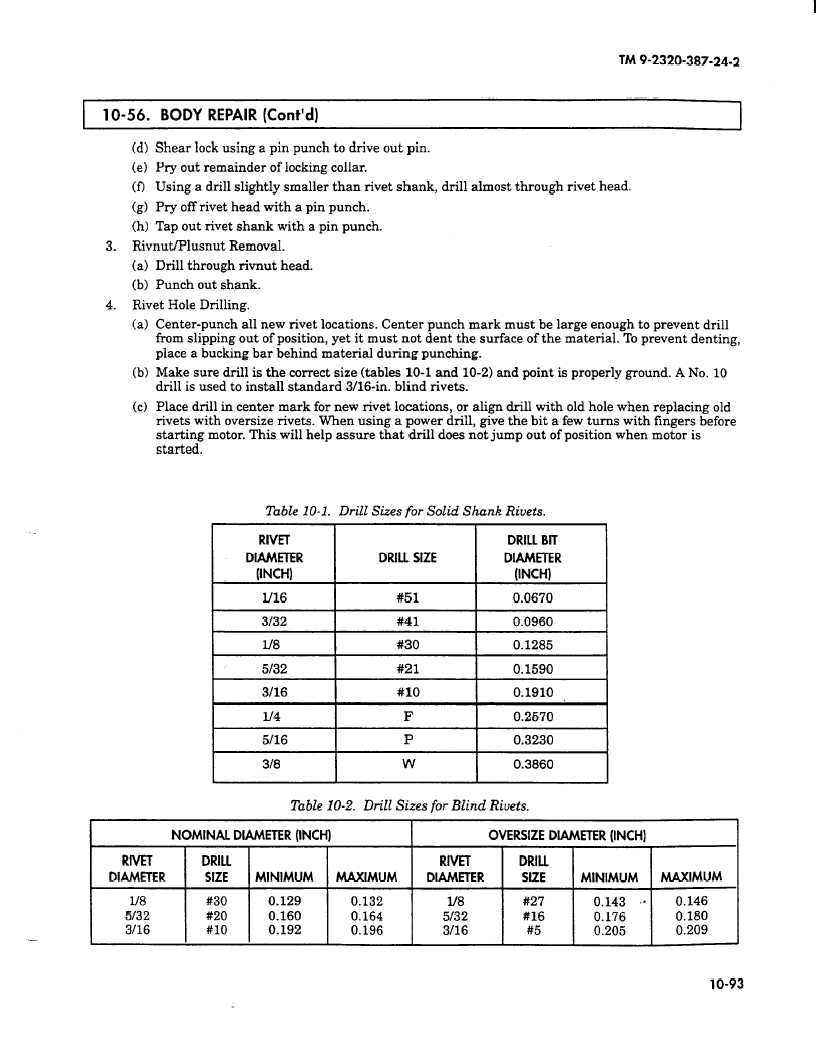
Make sure drill is the correct size (tables 10-l and lo-21 and point is properly ground. A No. 10
drill is used to install standard 3/16-m. blind rivets.
Place drill in center mark for new rivet locations, or align drill with old hole
the
a few
with fingers
starting motor.
will help
that drill
not jump
of position
motor is
Table 10-l.
Sizes for
Shank Rivets.
#41
0.0960
#30
0.1285
#21
0.1590
#lO
0.1910
F
0.2570
P
0.3230
W
0.3860
10-Z. Drill
for Blind
NOMINAL DIAMETER (INCH)
OVERSIZE DIAMETER (INCH)
RlVET
DRILL
RIVET
DRILL
DIAMETER
SIZE
MINIMUM
MAXIMUM
DIAMETER
SUE
MINIMUM
MAXIMUM
l/8
#30
0.129
0.132
l/8
#27
0.143
,’
0.146
5132
#20
0.160
0.164
5132
#16
0.176
0.180
3/16
#lO
0.192
0.196
3116
#5
0.205
0.209
1 o-93