10.
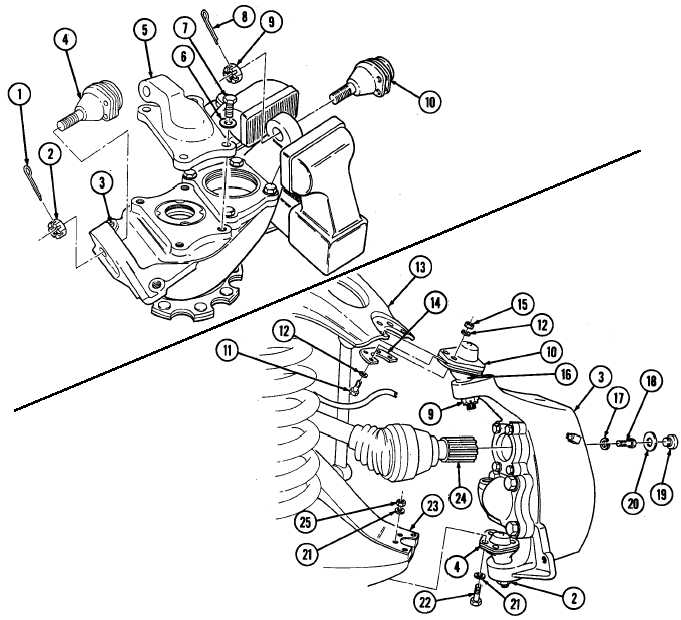
Install washer (20) and access plug (19) to geared hub (3). Tighten access plug (19) to 8-13 lb-ft
(11-18 N•m).
11.
Install lower ball joint (4) and geared hub (3) on lower control arm (23). Ensure lower ball joint (4) is
below lower control arm (23).
NOTE
Ensure outer capscrews on front ball joints are installed from top down, and
inner capscrews are installed from bottom up for M1123 and “A2” series
vehicles only.
12.
Secure lower ball joint (4) to lower control arm (23) with four washers (21), capscrews (22),
washers (21), and locknuts (25). Tighten locknuts (25) to 35 lb-ft (47 N•m).
CAUTION
Do not loosen slotted nut to install cotter pin. Doing this may result in
damage to equipment.
13.
Tighten slotted nut (2) on lower ball joint (4) to 73 lb-ft (99 N•m). Install cotter pin (1).
6-11. GEARED HUB REPLACEMENT (Cont'd)
TM 9-2320-280-20-2
Change 2
6-29

